Oracle Access Manager Password Management

This post covers the configurations and the required steps to achieve Oracle Access Manager Password Management Use-cases. In this set-up there is no integration with Oracle Identity Manager. In this set-up Oracle Access Manger version is 11gR2 (11.1.1.2) and OUD acts identity store.

Below are the main use-cases will be addresses using this password management.

  • Manage password policy the rules (ex: Minimum length, Special characters, Max no of attempts etc.)
  •  Force the user to modify the password on first login
  •  Force the user to modify the password if it is expired
  •  Notify the user when the password will expire
  •  Force the user to modify the password if it does not meet the password policy (from LDAP)
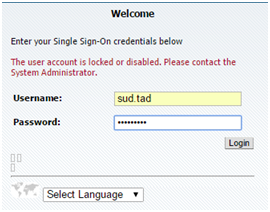
  •  Lock user based on the failed login-attempts; unlock the user based on the configurable time

Prerequisites

Before proceed with the below steps, make you have below environment/configuration already in place

  • OAM environment installed and configured with OUD as default & system store
  • Webagte is registered and also has integration with OHS .
  • Make sure index.html from the OHS is protected with OAM and able to access the same after providing the user information from OUD

Configurations

Extend LDAP Schema

1. Extend LDAP (OUD) schema with the OAM related objectclasses and the attributes.this is store the user password information.

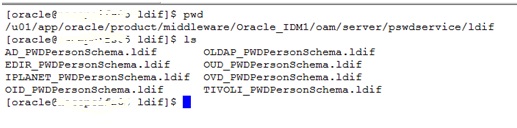
Go to this locatiom Location – <Oracle_HOME>/oam/server/pswdservice/ldif

ex:cd /u01/app/oracle/product/middleware/Oracle_IDM1/oam/server/pswdservice/ldif/

2.  Identify the required LDIF file and execute the following command (the command parameters may change based on your environment/ldap)

ex: cd /u01/app/oracle/product/middleware/asinst_1/OUD/bin

pass1

./ldapmodify -h <hostname> -p 1389 -D cn=”Directory Manager”  -f u01/app/oracle/product/middleware/Oracle_IDM1/oam/server/pswdservice/ldif/OUD_PWDPersonScheme.ldif

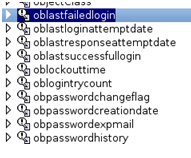
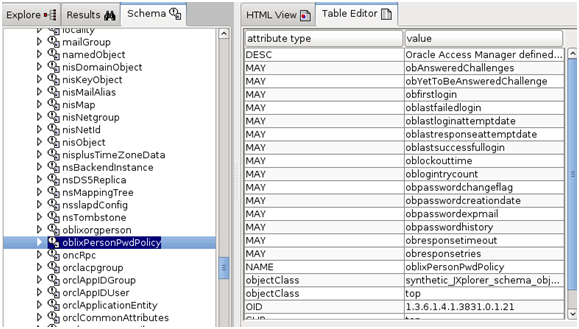
3. After successful execution of the command verify the weather schema is extended with the objectclass and the attributes mentioned in the LDIF file

pass2

pass3pass4


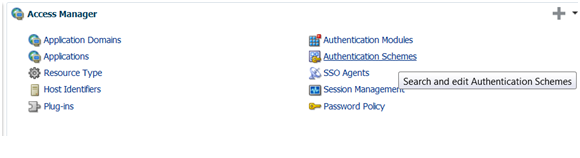
Configure Authentication Modules

  1. Login to Oracle Access Manager Admin Console
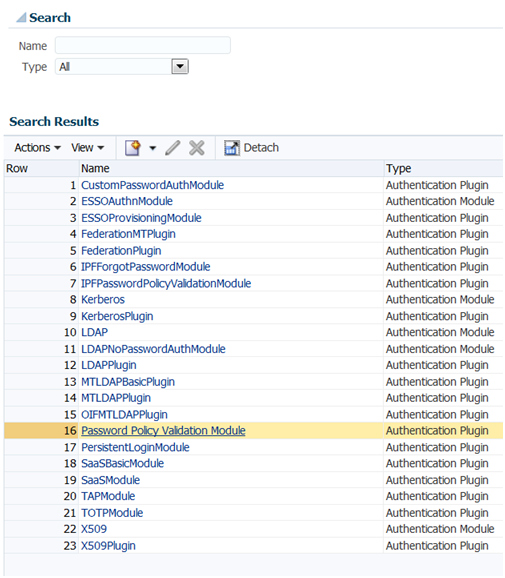
  2. Got o Authentication Modules->Select Password Policy Validation Modulepass5pass6
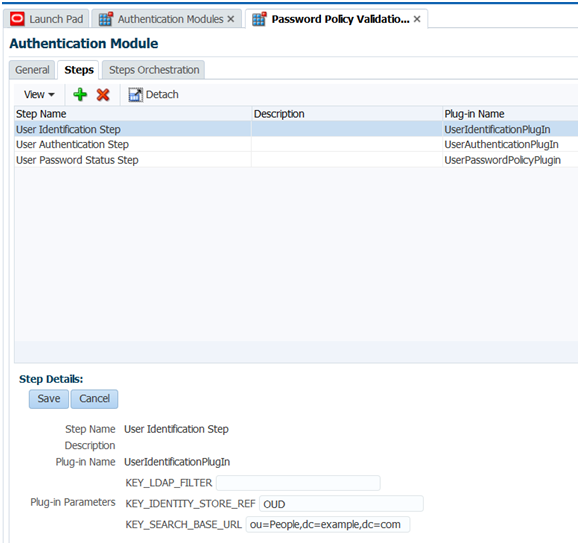
3.  Go to the Steps Tab Select User Identification Step and provide the Plug-in Parameters as shown below (Values may change based on your environment).pass7
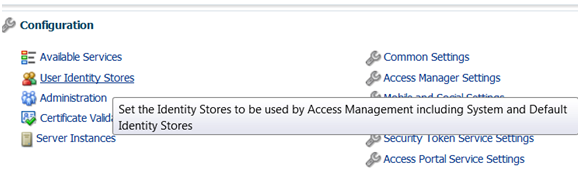
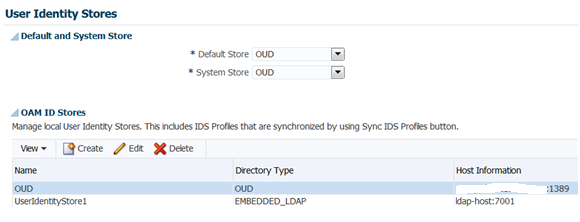
  3. To identify KEY_IDENTITY_STORE_REF go to the LaunchPad->Configuration->User Identity Stores, in this case the value is OUD
    pass8pass9
  4. Select the User Authentication Step and provide the values as shown below

pass105. Select User Password Status Step and provide the values as shown belowMake sure NEW_USERPSWD_BEHAVIOR to FORCECHANGEPASSWORD

pass11

6. Make sure click on Save for all the steps and click on Apply

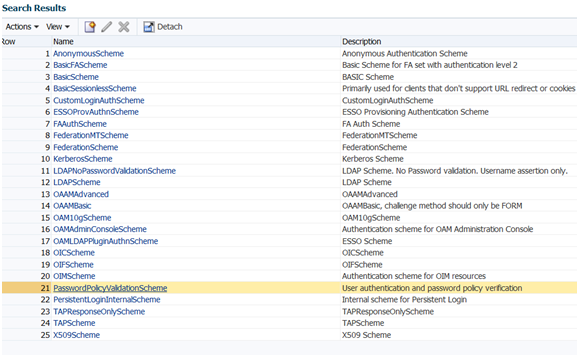
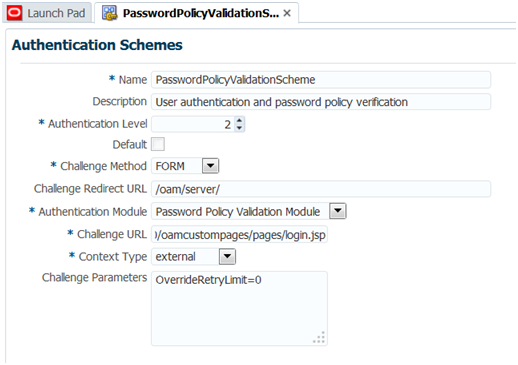
Configure Authentication Schemes

  1. Go to the Authentication schemes->Click on search->Password Policy Validation Scheme

pass12

pass13

2. Provide the values as shown below and the challenge url will be http://<hostname&gt;  :14100/oamcusompages/pages/login.jsp( this page is from the war file we are going to deploy on OAM Server in the next steps)

pass14

Configure Application Domains

  1. Go to the Application Domains->Webagte->Resources

pass152. Make you have index.html in the resource if not add the same

pass163. Click on the Authentication policy tab->Create Authentication Policy and create the policy with the below parameters

pass17

4. Click on the + symbol to add the resource index.html and click on Apply
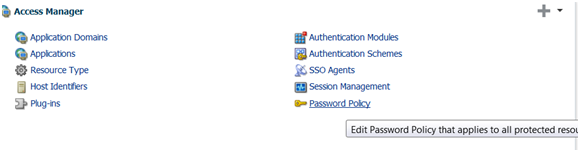
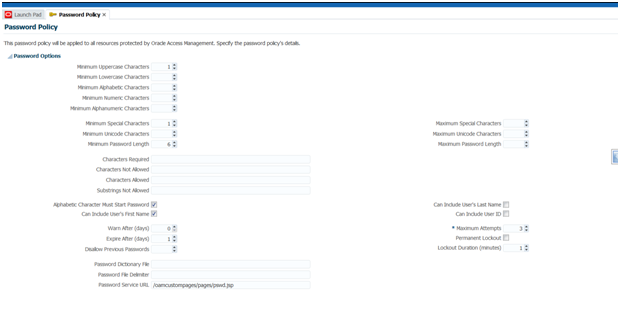
pass18

Password Policy

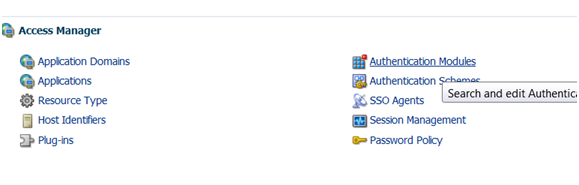
  1. Go to the launch pad->Access Manager->Password Policy

pass192. Verify the parameters and set Password Service URL as /oamcustompages/pages/pswd.jsp(we are going to deploy this pages in the next steps)

pass20

Deploying the OAM Custom Password Application

The are some issues with the war file comes with the product installation. If you would like see what are the issues and the fixes go through the below steps.

Refer the Oracle support site for more information on this.

  1. Get the oamcustompages.war from the below location. <Middleware_Home>/Oracle_IDM1/oam/server/tools/custompages
  2. Extract the war file to temporary location
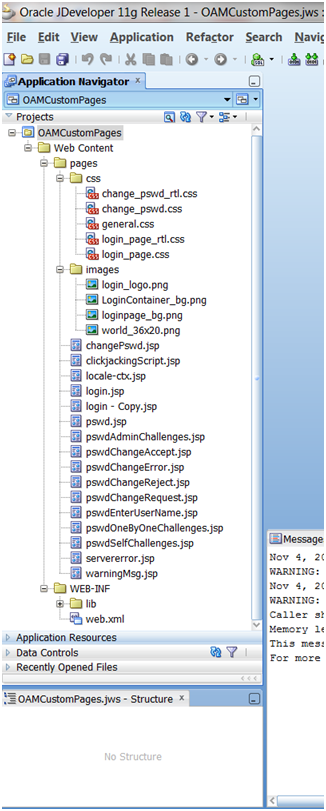
  3. Create new project using Jdeveloper and add the JSP’s,css,images and other files as shown below

pass214. Get the oam-server.ear from <middleware_Home>/Oracle_IDM1/oam/server/apps

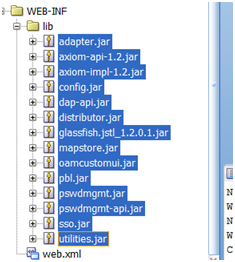
5. Extract the same to the temp location and add the below lib files from the same

6. Get the gasllfish_jstl_1.2.01.jar from \oam-server\ngsso-web\WEB-INF\lib

pass22

7. Create clickjackingScript.jsp file /pages with below content<%@page session=”false”%><style id=”antiClickjack”>body { display: none !important; }</style><script type=”text/javascript”>

if (self === top) {

var antiClickjack = document.getElementById(“antiClickjack”);

antiClickjack.parentNode.removeChild(antiClickjack);

} else {

top.location = self.location;

}

</script>


Update below files to refer clickjackingScript.jsp properly


changePswd.jsp

pswdAdminChallenges.jsp

pswdChangeAccept.jsp

pswdEnterUserName.jsp

pswdOneByOneChallenges.jsp

pswdSelfChallenges.jsp

warningMsg.jsp

8.In each of the above files,Replace<!– Start Disable frame hijacking Script–><%java.net.URL srcURL = new

java.net.URL(request.getRequestURL().toString());

String reqURL = srcURL.getProtocol() + “://” + srcURL.getHost() + “:”

+ srcURL.getPort();

%>

<c:set var=”hostUrl” value=”<%=reqURL%>” />

<c:import var=”antiClickJackingScript”

url=”${hostUrl}/oam/pages/clickjackingScript.jsp” charEncoding=”UTF-8″ />

<c:out value=”${antiClickJackingScript}” escapeXml=”false” />

<!– End Disable frame hijacking Script–>

With

<!– Start Disable frame hijacking Script–>

<%@ include file=”/pages/clickjackingScript.jsp” %>

<!– End Disable frame hijacking Script–>

pass23

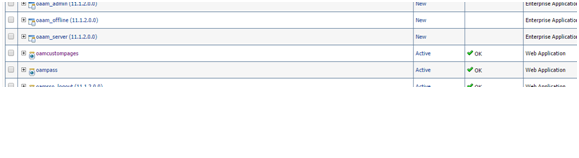
9. Now deploy the war file to your weblog OAM Server  and make sure the status is Active

Use Cases

Force user to change their password the first time they log in

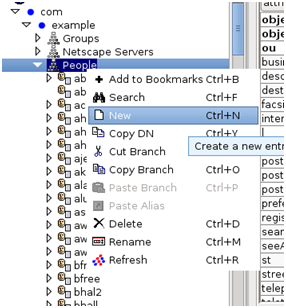
  1. Create new user in OUD and assign the oblixorgperson and oblixPersonPwdPolicy object classes as shown below.
  2. Assign the other mandatory fields and set the password as Welcome_1(in this case)
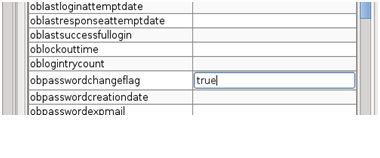
  3. Also assign obpasswordchangeflg to true

pass24

pass25

pass26


pass27

pass28


pass29

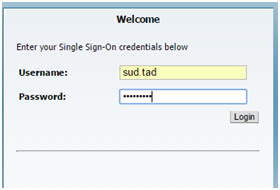
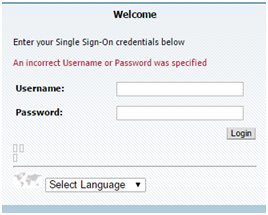
4. Now access the protected resource i.e http://<hostname&gt;:7777/index.html and see OAM redirects to the login page.

pass30

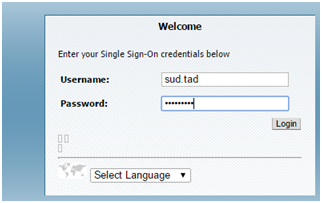
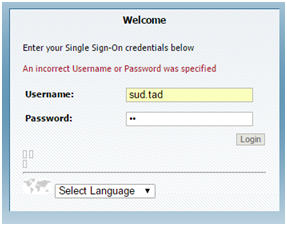
5. Enter the credentials of the user and see the OAM password management validates the policies and re-direct the user to password change page

pass31

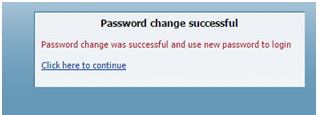
6. Observe the password policy rules and enter the old password and new password and verify the success page and click on continue.

pass32

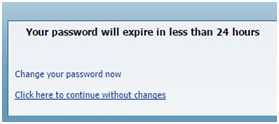
Password Expiry Notification

  1. Login to Oracle Access Manager Console-> Launch pad->access Manager->Password Policy
  2. And set the below values for demo purpose and click on apply

pass33

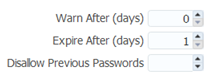
3. Now access the protected resource with the new password provided in the previous step.

pass34


4. Observe the notification for the password expiry.’

5. Choose the option you would like to proceed

pass35


Account Lock & Unlock

  1. Go to the password policy and provide the values as shown below

pass36

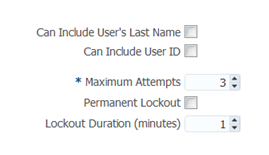
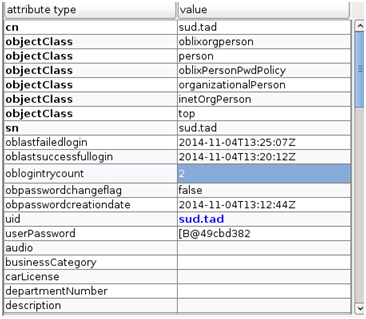
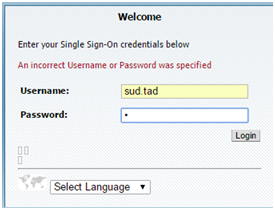
2. Now access the protected resource with wrong password for 3 times and see the message

pass37

pass38

pass39

pass38


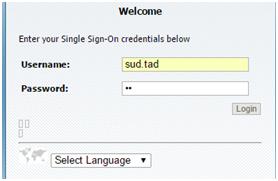
3. You can verify the value in the LDAP

pass40

pass41pass42pass43

4. Wait for 1 min for the lockout and see whether you are able to login again

pass44

pass45

pass46

This concludes the configurations & the use-cases

Posted in Uncategorized | Tagged , , | 9 Comments

IDM environment setup

Error
If you get “The required JDK for this installtion is 1.6.0 and JDK you are running currently with version 1.4.2” this error while installing weblogic you need to point to required java version.
Fix:
step1: verify current java version By defalut OEL5.6 comes with java1.4.2
$java -version
java version “1.4.2”
gij (GNU libgcj) version 4.1.2 20080704 (Red Hat 4.1.2-50)
install java1.6
step2:install jdk 1.6.0

step3:Login in with root and execute the following command
root$ln -sf /u01/app/jdk.1.6.0/bin/java /usr/java/bin
step4:verify java version
oracle$java -version
ava version “1.6.0_33”
Java(TM) SE Runtime Environment (build 1.6.0_33-b03)
Java HotSpot(TM) 64-Bit Server VM (build 20.8-b03, mixed mode)

Posted in Uncategorized | Tagged | Leave a comment

Query to get RCU version

1.To get the RCU version of the schemas installed.
SQL>SELECT OWNER, VERSION, STATUS, UPGRADED FROM SCHEMA_VERSION_REGISTRY

Result
————————————————————————-
DEVR2_BIPLATFORM 11.1.1.6.0 VALID N
DEV3_BIPLATFORM 11.1.1.6.0 VALID N
DEV_BIPLATFORM 11.1.1.6.0 VALID N
DEV3_IAU 11.1.1.6.0 VALID N
DEVR2_IAU 11.1.1.6.0 VALID N
DEVR2_MDS 11.1.1.6.0 VALID N

Posted in Uncategorized | Leave a comment

OAMR2 and BI Publisher Reports

This link has the information for the step by step instructions to get audit reports for OAMR2 in BI Publisher
http://oraclemiddlewareblog.com/2012/07/31/how-to-run-oam-11g-audit-reports-in-bi-publisher-11g/

Posted in Uncategorized | Tagged | Leave a comment

OHS,OID Auditing to Database

If you are not able audit data to database for OID and OHS after modifying the opmn.xml.Verify after doing the below steps.

1.Set the environment variables example
export ORACLE_HOME=/u01/app/oracle/product/11.2.0/dbhome_1
export ORACLE_INSTANCE=/u01/Oracle/Middleware/Oracle_WT1/instances/ohs
export COMMON_COMPONENTS_HOME=/u01/Oracle/Middleware/oracle_common

2.Follow the steps from “12.2.4 Configure a Database Audit Store for System Components” from http://docs.oracle.com/cd/E17904_01/core.1111/e10043/audpolicy.htm#BABIDHII

2.Remove the below to entries from opmn.xml after doing all the above mentioned steps and re-start the components
-Dstore.password=true
-Dauditloader.password=password

Posted in Uncategorized | Tagged | Leave a comment

Base Virtual Box on OEL

1. Introduction

This document helps in creating Base Virtual Box Image using Oracle Enterprise Linux. Following are the topics covered in the below post.

1.1.How to download Virtual box and Oracle Enterprise Linux.

1.2. How to install Virtual box on windows and Linux

1.3.How to run Virtual Box on windows and Linux

1.4.How to allocate Memory,Hard Disk Space, and Net Work settings

1.5.How to create Logical Volumes(LMV) on Virtual Box.

For more information on Virtual Box https://www.virtualbox.org/
2. Purpose
The base images will be used for installation, configuration and integration of various components or products.
3. System Requirements
To create base Virtual Box Image we need Windows/Linux system with sufficient Memory.
4. Download Location

Component Links
VirtualBox-4.1.0-73009-Win.exe http://www.oracle.com/technetwork/server-storage/virtualbox/downloads/index.html
Red Hat Enterprise Linux 5 (RHEL5) / Oracle Linux 5 / CentOS 5 VirtualBox-4.1-4.1.0_73009_rhel5-1.i386.rpm http://dlc.sun.com.edgesuite.net/virtualbox/4.1.0/ orhttp://download.virtualbox.org/virtualbox/4.1.0/VirtualBox-4.1-4.1.0_73009_rhel5-1.i386.rpm
Oracle Linux Release 5 Update 6 Media Pack for x86 (32 bit) https://edelivery.oracle.com/linux


5. Install Virtual Box

5.1. Install on Windows

Step1. Run the VirtualBox-4.1.0-73009-Win.exe

Step2.click next

Click on install and continue with the steps to complete installation.

5.2. Install Virtual Box on Linux

root>rpm -qa | grep Virtual to query if already installed

root>rpm -e VirtualBox-4.0-4.0.4_70112_rhel5-1 to remove

root>rpm -ivh VirtualBox-4.0-4.0.8_71778_rhel5-1.x86_64.rpm to install

5.3. Run virtual Box

Click on the VirtualBox icon in windows.

Execute VirtualBox command in Linux

root>VirtualBox

6.Creating New Image

The steps are similar in LINUX and Windows Environment.

Step1.Click on Machine tab and New

Step2: Click Next

Step3: Enter the following details

Name Value
Name IDMCOMPACT
Operating System Linux
Version oracle

6.1. Memory Settings

Allocate the memory based on your requirements

6.2. Creating a Root Disk.

Select Create New hard disk.

Select VDI and click Next


Select Dynamically allocated option and click Next

Specify the disk name and allocate the Hard Disk Space. And click Next

Click on create

6.3. Creating Software Disk

Click on storage tab

Select SATA Controlleràclick on +Icon to add new disk

Specify the name and allocate the required memory.

Repeat the same for creating a new disk.

6.4. System Settings

Select IDE Controlleràclick on Empty

Modify the Attributes as shown in the figureàSpecify the path for the OS Disk file.

Select the Bridged Adapter as shown in the figure.

Uncheck the Floppy Option.

Note: After successful installation uncheck the CD/DVD-ROM option as well. So that it will boot form HARD DISK.

Specify the processors.

7. OEL Installation

Click on start -> Icon

Press Enter to start booting

7.1. Creating Partitions

Select the custom layout

Select the first drive and click on New

Name Value
Mount Point /boot
File System Type Ext3
Allowable Drives Check sda and uncheck other drivers
Size 100 MB
Additional Size Options Fixed Size

Click on New to add partition.

Name Value
Mount Point ——-
File System Type Physical Volume(LVM)
Allowable Drives Check sda and uncheck other drivers
Size 100 MB
Additional Size Options Fill to Maximum allowable size

Click on New LMV.Enter the details as shown below.

Name Value
Mount Point <not applicable>
File System Type Swap
Logical Volume Name LogVol00
Size 3500 MB

Name Value
Mount Point /
File System Type ext3
Logical Volume Name LogVol01
Size 5500 MB

Name Value
Mount Point /tmp
File System Type ext3
Logical Volume Name LogVol02
Size 2016 MB

Click on New to add partitions for Second Disk

Name Value
Mount Point ——-
File System Type Physical Volume(LVM)
Allowable Drives Check sdb and uncheck other drivers
Size 100 MB
Additional Size Options Fill to Maximum allowable size

Click on the LMV to create Logical Volume

Name Value
Mount Point /u01
File System Type ext3
Logical Volume Name LogVol00
Size 25792 MB

Repeat the same for the Third Disk(sdc)

1.1. System Settings

Specify the Host Name and time settings

Specify the applications as shown below.

Click on Finish for reboot

Un-check the CD/DVD-ROM option as well in the boot order. So that it will boot form HARD DISK.

Posted in Uncategorized | Leave a comment

Authentication to OAM from Database using OVD

1.This post is to show how to make the oracle database as a authentication store to Oracle Access Manager using Oracle Virtual Directory(OVD).
2.Create a table in the database with required fields as username,password
3.Create an adapter in the OVD to map the database as shown below
3.1 Login in to OVD from ODSM.
3.2 Click on the Adapter tab and click on the Create New Adapter icon.

3.3 select Database as Adapter Type,Give any name, here i have given name as OAMDBAdapter and select Adapter Template as OAM/DB Adapter with script Script

3.4 Provide Name Space which will be used as a user base in OAM. select url type and database type based on your database.Provide the host name,port,database name,database user where the table with user details like username,password exists.

3.5 Brownse and select the Table where username and password details exists.

3.6 Map the cn,uid,userpassword with the database fields.

3.7. Mapping uid with userid similarly map cn with userid

3.8. Mapping userpassword with Passsword

3.9 Click on next

3.10 Verify the details and click on the finish.

3.11 click on the data browser tab and expand the dc=dbuser,dc=example,dc=com to verify the created users in the database table listed over here.

4. OAM configurations,Login to OAM admin console and click on the system configurations tab.Go to Data sources and click on the User Identity Stores then click on the create new icon to create a new user store for the database users.Provide the OVD details as shown in the figure.


4.1 Verify the Connection.

4.2 ore.Expand the Access Manager settings and Authentication module then click on create Create a new LDAP Authentication module and specify the testdb identity store and provide a name

4.3 Go to Policy Configurations tab and create new or choose existing LDAP Autentication scheme and provide the above created Authetication module.

4.6 Now all the protected resources with LDAP authentication scheme will be able to login wiht the users from the database.

Posted in Uncategorized | 2 Comments

Reset OAAM Challenge Questions from OAAM Admin console

1.Login to weblogic and Create a user named as oaamcsruser and add OAAMCSRGroup and OAAMCSRManagerGroup as shown below.


2.Login to OAAM Admin console using oaamcsruser.
3.Create a case to reset the challange question as shown below.


4.Now if the user logs in to the applications OAAM asks for the challenge Questions.

Posted in Uncategorized | Leave a comment